 by
by Creating a table in Word 2019
Tables organize text into rows and columns, which can make the text easy to type, edit, and format while spacing it correctly in your document. Tables organize text into cells, where a cell is the intersection of a row and a column.
Word provides four ways to create a table:
- Click the Insert tab, click the Table icon, and then highlight the number of rows and columns for your table (up to a maximum of eight rows and ten columns).
- Use the Insert Table dialog box.
- Draw the size and position of the table with the mouse.
- Convert existing text (divided by a delimiter character such as a tab or a comma).
Creating a table by highlighting rows and columns in Word 2019
Creating a table by highlighting rows and columns can be fast, but it limits the size of your table to a maximum of eight rows and ten columns. To create a table by highlighting rows and columns, follow these steps:
- Click the Insert tab.
- Move the cursor where you want to insert a table in your document.
- Click the Table icon.
A pull-down menu appears.
- Move the mouse pointer to highlight the number of rows and columns you want to create for your table.
When you highlight rows and columns, Word displays your table directly in your document so you can see exactly what your table will look like.
- Click the left mouse button when you’re happy with the size of your table.
Creating a table in Word 2019 with the Insert Table dialog box
Creating a table by highlighting the number of rows and columns can be fast, but it limits the size of your table to a maximum of eight rows and ten columns. To create a table by defining a specific number of rows and columns (up to a maximum of 63 columns), follow these steps:
- Click the Insert tab.
- Move the cursor where you want to insert a table.
- Click the Table icon.
A pull-down menu appears.
- Click Insert Table.
The Insert Table dialog box appears.

- Click in the Number of Columns text box and type a number between 1 and 63, or click the up or down arrow to define the number of columns.
- Click in the Number of Rows text box and type a number or click the up or down arrow to define the number of rows.
- In the AutoFit Behavior group, select one of the following radio buttons:
- Fixed Column Width: Defines a fixed size for the column widths, such as 0.3 inches
- AutoFit to Contents: Defines the width of a column based on the width of the largest item stored in that column
- AutoFit to Window: Expands (or shrinks) the table to fit within the current size of the document window
- Click OK.
Word draws the table in your document.
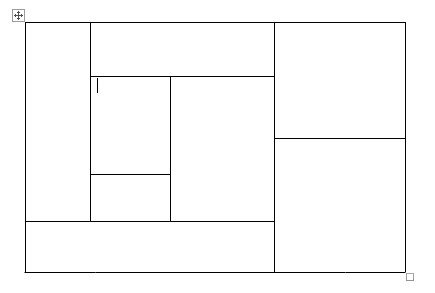
- Creating a table in Word with the mouse
Drawing a table can be especially useful when you want to place a table in the middle of a page and create rows and columns of different sizes.
To draw a table in your Word document, follow these steps:
- Click the Insert tab.
- Click the Table icon.
A pull-down menu appears.
- Click Draw Table.
The mouse pointer turns into a Pencil icon.
- Move the mouse pointer where you want to draw your table, hold down the left mouse button, and drag the mouse to draw your table.
Word draws a rectangular dotted box to show where your table will appear.
- Release the left mouse button when you’re happy with the size and position of your table.
- Draw the boundaries for your table’s rows and columns:
- To draw vertical lines in your table, move the mouse pointer to the top or bottom of the table, hold down the left mouse button, and drag the mouse up and down.
- To draw horizontal lines in your table, move the mouse pointer to the left or right side of the table, hold down the left mouse button, and drag the mouse right and left to draw.
- Press Esc or double-click to turn the mouse pointer from a Pencil icon back to an I-beam pointer.